
Why Wrist Support Is Essential in Boxing Gloves
Why Wrist Support Is Essential in Boxing Gloves Introduction – The Hidden Hero of Boxing Gloves Most people buy boxing...

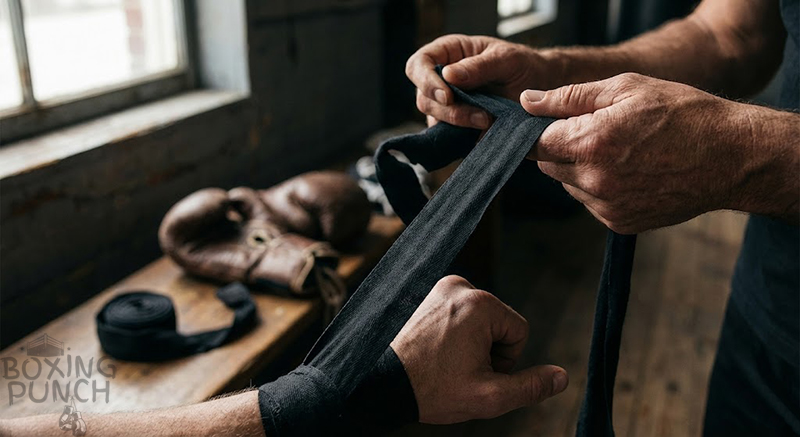
Walk into any boxing gym from Philadelphia to Mexico City, and you’ll see the same ritual. Before a glove ever touches a heavy bag, before the timer dings, and before a single drop of sweat hits the canvas, the fighter sits down. They unroll a spool of fabric and begin the process.
This isn’t just about safety; it’s a meditation. It’s the moment you transition from a regular person into a fighter.

The first time you walk into boxing, wrapping your hands feels optional. You see experienced fighters doing it quickly, almost casually, and you think gloves alone are enough.
They’re not.
Hand wraps are your first line of defense. They protect your knuckles, stabilize your wrist, and quietly prevent injuries that can end training before it really begins. Learning how to wrap your hands properly for boxing isn’t just a beginner skill—it’s a lifelong habit.

If you are reading this, you probably just bought your first pair of 180-inch wraps, or maybe you’ve been relying on those slip-on gel wraps and realized they just aren’t giving you the wrist stability you need. You are in the right place. Wrapping your hands is an art form, and mastering it is the single most important thing you can do to prolong your boxing journey.
Let’s dive deep into how to wrap your hands properly for boxing, turning your loose, fragile hand bones into a solid, heavy cast ready for impact.

Your hands weren’t designed to repeatedly smash into hard objects. Inside your fist are small bones called metacarpals, and when they’re unprotected, they’re vulnerable to one of the most common injuries in boxing. These bones are surprisingly easy to break with improper impact, leading to the infamous Boxer’s Fracture.

The goal of the hand wrap isn’t just to provide a cushion for your knuckles—that’s what the glove is for. The wrap intends to bind all those tiny bones together so that when you strike, the shock distributes evenly across your arm rather than shattering a single knuckle. We are essentially building a temporary cast.
Wrapping creates a protective cushion around the knuckles and keeps the bones aligned. It also adds essential wrist support, especially during heavy bag work, where impact forces travel back into the joint. Good wraps absorb shock, distribute pressure, and keep your hand functioning as one solid unit instead of loose parts.
Think of wraps like seatbelts. You may not notice them when things go right, but when something goes wrong, they save you.

Before you can build, you need the right materials. Walk into any store, and you’ll be faced with a wall of options. Let’s break it down.

For beginners, choosing wraps can feel confusing, but it doesn’t need to be.
Most boxing hand wraps for beginners come in two sizes: 120-inch and 180-inch wraps. If you have smaller hands, shorter fingers, or are a youth or female boxer, 120 inches often works well. Most adults prefer 180-inch wraps because they allow better wrist support and knuckle padding.
Before we start twisting fabric, we need to make sure you’re holding the right tools. Not all wraps are created equal.

This is one of the most important choices.
If you ask any expert perspective, they will point you toward Mexican Style Wraps.
Mexican-style hand wraps are made from elasticated or semi-stretch fabric. They mold to your hand, feel snug, and are the current trending wrap type for serious training. Cotton wraps are non-stretch and feel stiffer, but can lack comfort.
Mexican vs cotton isn’t about right or wrong—it’s about feel. Most boxers eventually prefer Mexican-style wraps because they move with the hand rather than against it.
Note: Traditional Cotton Wraps are non-stretch. They’re breathable, classic, and forgiving for beginners because you can’t over-compress as easily. The downside is they can loosen and “break in” during a long session, requiring a re-tightening.

Unless you are wrapping hand wraps for small hands (like for a child or a very petite youth), always go for the 180-inch wraps. The standard 120-inch ones (often sold in department stores) are simply too short to weave between the fingers and create proper knuckle padding. You need that extra length to create the X-Pattern that locks the hand bones together.

Quick-wraps, gel wraps, and glove-style wraps are popular among home fitness enthusiasts because they save time. They slide on quickly and feel convenient.
Traditional wraps offer superior customized protection. Quick wraps don’t provide the same metacarpal alignment or wrist lock. From an expert perspective, gel wraps are fine for light workouts, but traditional wraps win for safety, especially during heavy bag sessions.
However, for serious heavy bag work or sparring, nothing beats a traditional wrap. Quick wraps don’t secure the wrist joint nearly as well as a manually tightened cloth wrap.

Every wrap has key parts.
Understanding these parts helps you wrap with intention, not guesswork.
Think of them as training wheels—useful to start, but not for the full journey.

The Learning Curve
What to Expect
Mastering the wrap takes time. It’s a skill, just like the jab.

This is where we move from theory to practice. Find a quiet space; lay out your 180-inch wrap with the thumb loop and Velcro closure facing up. Unroll your wrap completely (or hold the roll in your palm). Let’s build your armor.
This method balances protection, comfort, and power transfer.
Step 1: The Anchor (Finding Your Foundation). Place the thumb loop over your thumb. Now, take the wrap and pull it across the back of your hand and around your wrist. Do this three times. This isn’t just a start; this is you building the solid, unshakable base upon which everything else rests. Your wrist should feel supported, not strangled.
Wrist Support
We are going to wrap around the wrist three times.
Intent: This is your foundation. You want this firm but not constricting. The goal is to minimize how much your wrist can bend backward upon impact.
Technique: Keep the wrap flat. No wrinkles.

Step 2: The Thumb Lock (Securing the Weak Link). From the wrist, bring the wrap down to the base of your thumb (the webbing between thumb and index finger), loop it around your thumb once, and then bring it back to the wrist. You’ve just created a secure “figure-8” that anchors your thumb to your wrist, protecting that vulnerable, floppy joint from hyperextension.

Step 3: Building the Knuckle Pad (The Heart of the Matter). Now, from the wrist, bring the wrap across the back of your hand, over your knuckles (metacarpal heads), and around your palm. Do this three times. On each pass, shift the wrap slightly so you’re creating a layered, protective cushion that evenly covers all four major knuckles. This pad is what will absorb the shock, sparing your bones.

Step 4: The X-Pattern (Between the Fingers). The Spider Web (The Expert’s Secret). Here’s the magic most beginners miss. This is the “secret” sauce that separates a novice wrap from a pro wrap. We need to secure the fingers to prevent them from smashing into each other. After your last knuckle pass, you’re at your palm. Now, weave the wrap between your fingers. Start by going between the pinky and ring finger. Bring it across the back of your hand, down to the wrist, wrap once, and then go between the ring and middle finger. Repeat until you’ve webbed between all four fingers. You are essentially drawing an “X” on the back of your hand with the fabric. This X-Pattern pulls the knuckles together.
This technique, often called the “Mexican weave,” is what transforms your hand from a wrapped object into a single, solid block. It eliminates any independent movement between your metacarpals.

Step 5: The Final Lock. Once your spider web is complete, finish with two more solid revolutions over the knuckles to lock all that finger-weaving securely in place.
The thumb is the easiest thing to jam in boxing. Wrap once completely around the thumb. Come back to the wrist. This acts as an anchor, pulling the thumb slightly toward the hand so it doesn’t get caught on an opponent’s elbow or the side of the bag.

Step 6: The Secret Lock. Your journey ends where it began. Bring the remaining wrap down and make 2-3 final, tight revolutions around your wrist. This final anchor gathers all the tension and support from the entire wrap and focuses it on stabilizing your wrist joint. After finger wraps, return to the wrist and tighten slightly. This locks everything together and improves power transfer.

Step 7: Final Wrist Support & Closure. You should have a little bit of length left. Use the remainder to wrap around the wrist again. We finish at the wrist because that is where we need the most structural integrity.

For extra wrist support, add an extra loop around the wrist before finishing. During heavy bag work, prioritize knuckle padding. For sparring, distribute padding evenly.
Always adjust your wrap style to your training goal.
Don’t expect to master this in one go. This is a skill built through mindful repetition. Here’s your week-long plan to build muscle memory.
Day 1 & 2: The Foundation. Don’t even put on the full wrap. Just practice Steps 1-3: The Anchor, Thumb Lock, and Knuckle Pad. Do it slowly, five times on each hand. Your goal is to make these movements feel natural and to get the tension right—snug and secure, not cutting off circulation.
Day 3 & 4: Weaving the Web. Now, integrate Step 4: The Spiderweb. This will feel awkward. Your fingers will feel like you’re wearing a weird glove. That’s normal. Practice the full sequence from Step 1 through Step 4, then just take it off. Focus on the pattern: pinky-ring, ring-middle, middle-index.
Day 5 through 7: The Complete Ritual. Now, run the full 7-step gauntlet. Time yourself. On Day 5, it might take 8 minutes per hand. By Day 7, aim for a consistent 4-5 minutes. The goal isn’t just speed; it’s consistent, even tension throughout the entire wrap. Make a fist. Does your hand feel like a unified, solid block? Perfect.

With the steps, people go wrong, even experts make mistakes. Here is what to watch out for to ensure safety and effectiveness.
Mistake #1: The Stranglehold. Is Your Wrap Too Tight? (Veno-Occlusion), The stranglehold. You finish wrapping, and your fingers turn purple or feel cold within 5 minutes, your wrap is choking your blood supply. There is a danger of wrapping too tightly, known as Veno-Occlusion. So you’ve committed veno-occlusion. The wrap should be as tight as a firm handshake, not a tourniquet. You should be able to make a tight fist without restriction. A good test is to make a fist for 10 seconds after wrapping, then open your hand. Any tingling or discoloration means it’s too tight.
The Fix: You don’t have to redo the whole thing. Usually, undoing the wrist section and re-tightening it more loosely solves this.
Wrist Flexion: If you can bend your wrist all the way back easily while wrapped, you didn’t use enough tension on the wrist section. The wrap should act as a brace.
Bunching in the Palm: If you have a big ball of fabric in your palm, you won’t be able to make a proper fist. This prevents your knuckles from aligning correctly. Keep the palm open and flat as much as possible during the wrapping process.
Mistake #2: The Floppy Mitt. Conversely, if you can easily slide a finger under the wrap or if it loosens noticeably after a few shadowboxing moves, it’s too loose. It needs to be a partner to your skin.
Mistake #3: Neglecting the Thumb. That single figure-8 around the thumb in Step 2 is not optional. A sprained thumb from a glancing punch is a pain that lingers for weeks.
Expert Pro-Tip: Before you even put the loop on your thumb, take the first 12-18 inches of your wrap and fold it back and forth to create a pre-made, multi-layered square. Place this square directly over your knuckles when you start Step 3. This gives you instant, perfect knuckle padding without bulk elsewhere.

Long-Lasting
Your wraps will get sweaty. If you leave them in your gym bag, they will smell terrible. But washing them can be a nightmare if you don’t know the trick.
How to wash boxing wraps without tangling?
If you throw loose wraps in the washing machine, you will open the door to find a “spaghetti monster”—a giant, wet knot that takes an hour to untangle.
To wash boxing wraps without tangling, roll them into loops or place them in a mesh laundry bag. Air-dry them to preserve elasticity. Clean wraps last longer and smell better—simple but often ignored.

The Care Chapter: Your wraps will stink. Wash them. After training, simply toss them into a mesh lingerie bag and run them through the washing machine on a cold, gentle cycle. The bag prevents them from turning into a hopelessly tangled knot. Air-dry them. They’ll last for years.
Other mistakes include poor knuckle padding and ignoring wrist alignment. Wrapping should feel supportive, not restrictive.

Your Hands, Your Career
Learning how to wrap your hands properly for boxing is the first victory you win in the gym. It signifies respect—respect for the sport, and respect for your own body.
Wrapping your hands is the first true skill you learn in boxing. It’s a ritual that separates the casual from the committed. It’s a moment of focus, of self-care, of acknowledging the violence you’re about to ask your body to perform and taking responsibility to protect it. When you master this—when the 7-step flow becomes as natural as tying your shoes—you gain more than just safety. You gain confidence. You step into the gym or in front of the bag knowing your foundation is rock solid. This knowledge, this skill, lasts a lifetime. It’s the quiet art behind every powerful, safe punch you’ll ever throw.

And secondly, by following this 7-Step Method, using the right 180-inch Mexican-style wraps, and paying attention to the tension, you ensure that tomorrow you can wake up and type on a keyboard or hold a coffee cup without pain. A good wrap transforms your hand from a fragile instrument into a hammer.
Every great boxer starts by taking care of their hands. So, grab your wraps, find your rhythm, and protect your tools. The heavy bag is waiting.

Unwrapping Your Doubts
A: Most adults use 180-inch wraps for full protection.
A: They’re more flexible and comfortable, especially for beginners.
A: Yes, for light training, but traditional wraps are safer.
A: Yes. They significantly reduce the risk of Boxer’s Fracture and wrist strain.
A: You can, but it is not recommended for heavy bag work. 120-inch wraps often run out of fabric before you can adequately wrap between the fingers or secure the thumb. 180-inch wraps provide the necessary length for full protection.
A: They should feel snug like a sock, not tight like a tourniquet. When your hand is open, the wrap should feel comfortable. When you make a fist, the wrap should tighten up and feel solid.
A: You have likely wrapped too tightly around the wrist or the knuckles, cutting off circulation. This is common for beginners. Unwrap and try again with slightly less tension, specifically when engaging the elasticated/semi-stretch fabric.
A: Mexican-style wraps contain elastic fibers that allow the wrap to stretch and contour to the hand, providing a tighter, more custom fit. Traditional cotton wraps are rigid and do not stretch, which can sometimes loosen during a workout.
A: Yes. Even light punches generate force that can misalign the tiny bones in your hand. Wrist support is crucial regardless of intensity to prevent sprains and Boxer’s Fracture.
A: Think “secure,” not “tight.” A perfect wrap should feel like a firm, full-hand handshake. Once wrapped, make a fist and hold it for 15 seconds. If you feel any pinching, numbness, or see your fingertips changing color, they are dangerously tight. You should be able to clench and open your hand freely without any restriction.
A: Technically, yes, but it’s a terrible idea for hygiene and longevity. The sweat and bacteria trapped in the fabric will break down the fibers faster and create a permanent, sour smell. It’s also a great way to get skin infections. Get multiple pairs or make washing part of your post-workout routine.
A: Generally, yes. A person with large hands will use up more material just covering the basic surfaces. Someone with very large hands might even seek out 210-inch wraps. If you have larger hands and find a 180-inch wrap barely gets you through the full sequence without material to spare, you need a longer wrap. Conversely, people with very small hands might manage with a 170-inch.
A: Look for brands that sell “youth” or “small hand” specific wraps, which are often a bit narrower in width. The standard technique still applies, but you might find you need one less revolution around the wrist or knuckles to avoid bulkiness. The key is ensuring the wrap lies flat and doesn’t bunch up.
A: This is almost always a case of wrapping too tightly, especially if you’re using elastic Mexican-style wraps. The compression is cutting off blood flow. Next session, consciously use 20% less tension when pulling the wrap, especially around the wrist and when creating the knuckle pad. The wrap should hold itself in place; you shouldn’t have to force it.
Why Wrist Support Is Essential in Boxing Gloves Introduction – The Hidden Hero of Boxing Gloves Most people buy boxing...
 27")
Transform Your Home, Transform Your Fitness Level Top 10 Punching Bags for Home Training (Expert Guide 2025) Let's be honest....
Plyometrics for Boxing Science vs Myths Plyometrics aren’t about jumping higher — they’re about firing muscles faster. Boxing relies heavily...